Locations: Explore
The Explore tab enables you to scan the file system for samples and libraries.
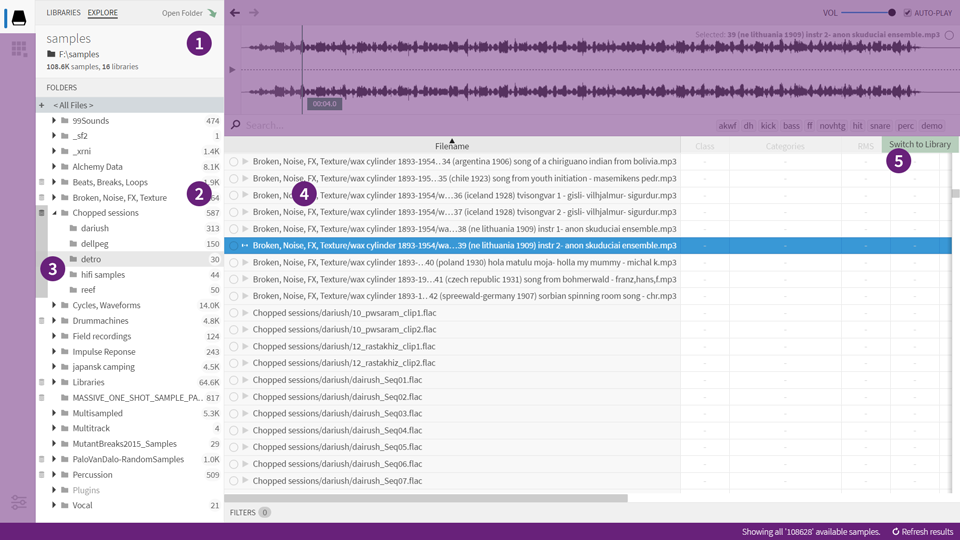
The explore tab
- Mount Panel - shows the path and status of the selected folder
- Sample Count - located on the right side of the folder tree
- Libraries - displayed on the left side of the folder tree
- Search results - a table containing file properties (no descriptors)
- Convert/Switch - button to convert, or switch (if folder is already a library).
How it works
On first glance, the Explore tab looks lot like the Libraries tab (situated right next to it). And while that’s largely true, there are a few key differences. First of all, the explorer is more suitable for ‘casual browsing’ as it doesn’t analyze each and every file it encounters. Secondly, it detects and highlights folders containing libraries, and/or samples. This is useful for getting a visual overview of even the largest file structure.
Limitations
There are a couple of important limitations to keep in mind:
-
The explorer does not allow you to search files by similarity. While you can use it to launch a similarity search, you can’t search the folders themselves in this mode. Instead, pick your source file, and then switch to a library in order to continue your search.
-
The explorer does not allow advanced filtering. Only filtering by search terms are supported in this mode.
Opening a folder
From the Explore tab, push the “Open Folder” button. Alternatively, choose “Open Folder” from the File menu, or use the accompanying keyboard shortcut. In both cases, a system dialog will open, which allows you to pick a folder on your computer.
Once you have selected a folder, the application will start to scan the file system.
Note that folders are scanned recursively, just like a disk-scanning utility would. A cache is built the first time you open a folder, which should result in quicker access later on.
Browsing folders
The lower part of the sidepanel will display a tree, listing all folders and libraries, and highlighting supported files. By default, the topmost/root folder is selected, but you can select any sub-folder to give it priority. This is handy, since a priotized subfolder will be processed before any other folder.
Detection of libraries
To help you quickly determine whether and where libraries are present in the path you’re browsing, the tree contains a special popout menu:
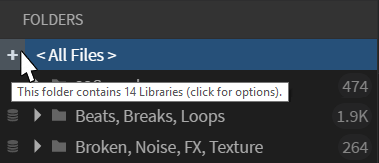
If the path doesn’t contain any libraries, this button will not appear.
Clicking the “+” button will display a list of libraries and allow quick switching between them (tip: Undo Query Change can be your friend here).
Additionally, the “strip” in the left side of the folder tree highlights any indexed folders (libraries) that have been detected.
Refreshing contents
To ensure that the entire folder structure is up-to-date, you can refresh the results via a button in the lower right corner of the status bar. Alternatively, you can select “Refresh Results” by clicking the “gear” symbol (options), located in the topmost part of the sidepanel.
Perhaps confusingly, there is another refresh option up there called “Hard Refresh”. Choosing this option will wipe the cache and completely re-index the selected folder. Usually, file/folder integrity should be fine - this option is there, “just in case”.
Recent folders
Even if the Explore tab only allows browsing a single folder at a time, you can still jump between often-used folders by heading into the File menu and choosing “Open Recent Folder”.