Search Results
Search results are shown in a large table with each column representing a property or descriptor.
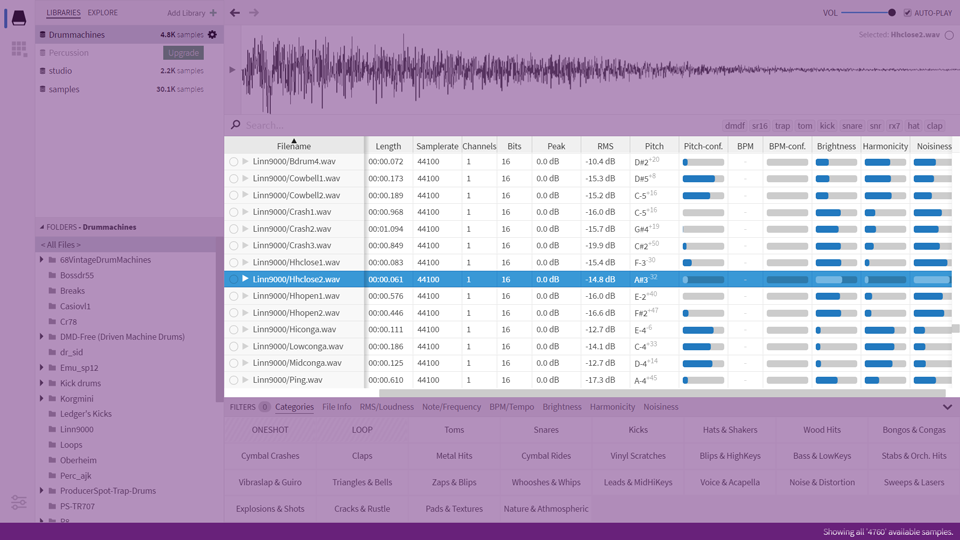
Showing search results from the selected library
The results you are seing arrives from either a library, or the explore tab. It’s easy to tell that you are browsing a library, as all columns (all audio descriptors) are available to those.
Selecting and navigating
The table supports both single and multi-select. This allows you to select one or more items, e.g. to drag them into a project. To learn the shortcuts for (multi-)select and navigating the table, please read about the available keyboard shortcuts.
Whenever you select a sample, it is shown in the waveform-panel. Also, if you have enabled auto-play, the selected file will automatically be previewed.
Scrolling
Vertical - Use the mouse wheel, keyboard shortcuts, or touch swipe to scroll through results.
Horizontal - Use the mouse, keyboard (arrow keys) or touch swipe to step sideways through the available columns. Note that the first column (Filename) is fixed when scrolling horizontally.
Sorting results
Each column can be sorted by clicking the column header.
It works like you would expect, with one exception: in similarity search mode, only the similarity columns are sortable.
Hiding results
If you come across some audio files that won’t be needed, but also shouldn’t be deleted, you can mark such files as “hidden”.
Simply right-click the files, or use the provided keyboard shortcut to hide them. Once hidden, they won’t appear in search results until you choose to make them visible by means of the Hidden Files filter.
Assigning values
If a file seems to have the wrong BPM or an inaccurate note assigned to it, this is easily fixed: simply hover over the relevant table cell and click the little icon that looks like a pencil. This will allows you to pick an appropriate value:
And should you need to change values for multiple results, the menu you see in the screenshot above is also accessible from the regular context menu. Look for “Assign Note”, “Assign BPM”, and so on.
Shuffle/randomize
When you’re always revisiting the same old folders again and again, enable the Shuffle Mode to see a freshly randomized set of results every time:
Note: if you choose to sort by a column (e.g. filename) or start a similarity search, the shuffle mode is temporarily disabled.
Also, don’t forget that Sononym has a random preview feature, which selects (and plays) a random file from the current set of results.
Row Options
Each row in the table contains two buttons: the small circle will launch a similarity search and the play button will preview the sound.
Right-click any item to bring up a menu with the available options. This includes the ability to add the item to a(ny) project, reveal the location in Explorer/Finder, and more.
Note also that you can adjust the height of table rows in the Display Configuration
Column Options
Right-clicking any column-header will bring up a menu where you can decide which columns to show:
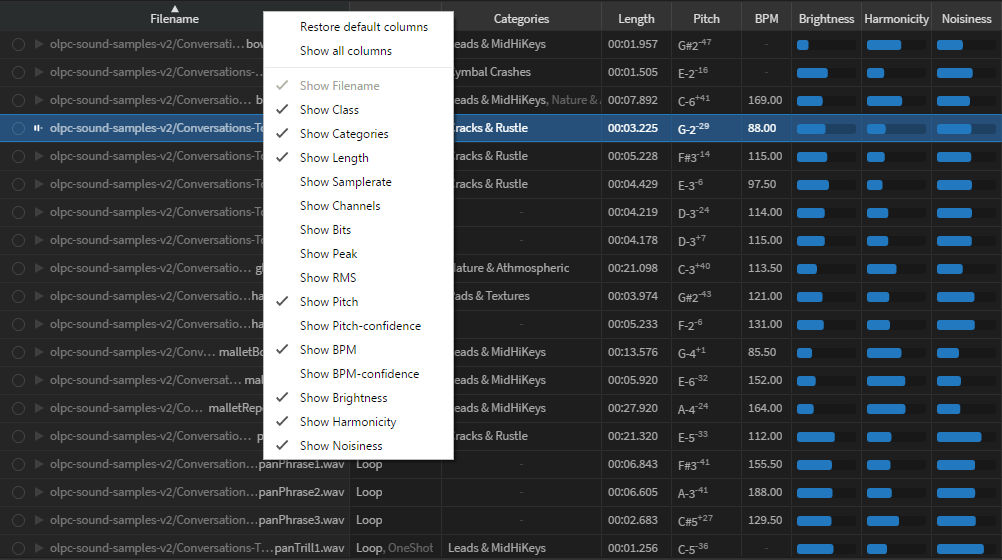
Showing the context menu listing all regular columns
The menu is also available from the application menu > View > Columns.
The Column Options menu also includes all metadata tags - but since there are many possible entries, we decided to structure the menu like this:
- All columns - all types of metadata, including rare/unusual ones.
- Commonly Used - the most commonly used types of metadata (artist, genre, etc.).
- Actually Used - the actually used metadata within the selected library.
Table Layout
Note: changes to the table layout will create new entries in the Query History.
- Pinning and Unpinning Columns: By default, the Path and Favorite columns are fixed on the left-hand side of the table. You can change this by right-clicking a column and choosing ‘Pin This Column’ to either pin or unpin the column.
- Reordering Columns: If you want to reorder columns, simply click a table header and drag it sideways until the desired position has been found.
- Reset Table Layout: To reset your modifications to the table layout, you can click the table header and choose “Reset Column Layout”.
See also
- Descriptors - how to interpret each of the columns in the results table
- Searching - using free-text terms to search among results
- Filtering - defining advanced filters for narrowing down results
Related pages
- Does Sononym support embedded metadata?
- Can Sononym show audio properties such as number of channels and bit-rate?