Locations: Libraries
Libraries are folders on your harddrive that have been analyzed by the software. Technically, they are small databases containing information about your samples. These data provide the foundation for similarity-search and many other features.
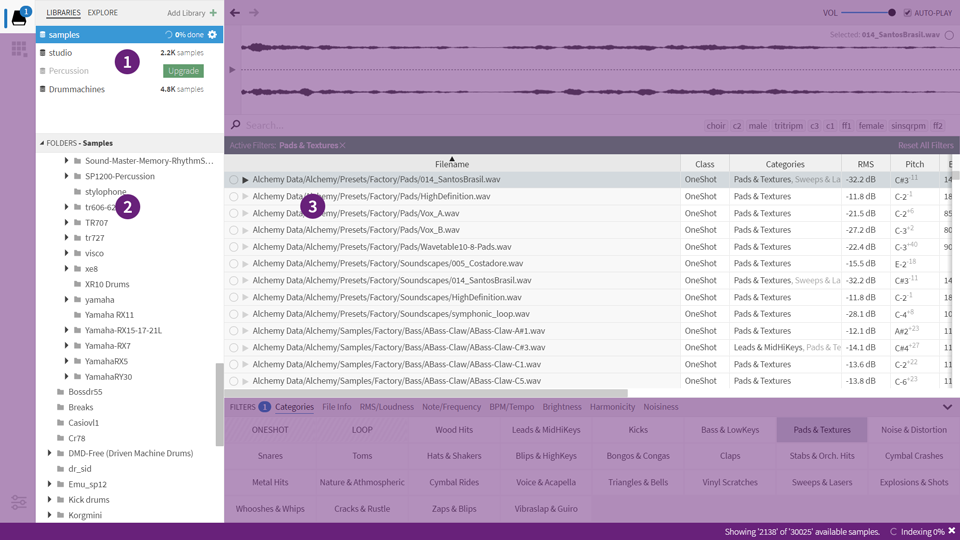
The libraries tab
- Libraries - list of libraries that are currently available
- Folder tree - displays folders for the selected library
- Search Results - a table displaying your search results
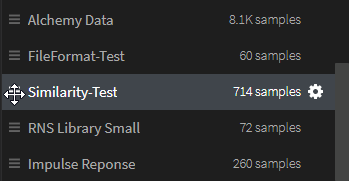
Selecting libraries
The list of active libraries appear in the topmost part of the Location sidepanel, while the “Libraries” tab is active. And your search results are of course dictated by what library(-ies) you might have selected in this list.
To select a library, simply click it. To select more than a single library (i.e. combine libraries on-the-fly), hold Command/Ctrl pressed while selecting a library, or use the Shift modifier to “extend” the existing selection. You might notice a brief preparation time, after which the “combined” results should appear in the browser.
Current Limitations: there is currently a limit to how many libraries that can be combined on-the-fly. If you have chosen more libraries than the software supports, any libraries shown with a “striped” background will not included in the results.
Note that this striped background is also applied to libraries whose content isn’t available for some other reason (e.g. in need of an upgrade, not found on disk etc).
In the list of libraries, any library can be right-clicked to bring up it’s context menu. A special case is when multiple libraries are selected: in such a case, right-clicking within the selection will bring up a context menu that applies to all the selected libraries instead of a single one.
If you have selected multiple libraries and need to show options for a specific library within that selection, this is possible too: press the “gear” icon on the left-hand side to bring up its context-menu.
The panel also allows you to drag items around in order to re-arrange them:
Dragging items to re-arrange
In addition to re-arranging by dragging, you can also sort libraries by name or path via the context menu.
Creating & Opening
If you’ve used Sononym for more than a few minutes, you will probably already have created a library.
Creating a new library is meant to be as easy as possible - you can simply drag a folder on top of the application. Alternatively, you can pick a folder using the “Add library” button, or by choosing “Create Library” from the File menu.
If the selected folder is already a library (containing a file named sononym.db), it will be made accessible right away. Otherwise, the application will start to index the contents and shortly, samples will begin to appear. You can track the indexing progress in the upper part of the sidepanel, as well as in the status bar.
Refreshing (Look for Changes)
Of course, your sample collections aren’t necessarily static. You might add, change or move files around at any given time. When this is the case, the Sononym library will need to be refreshed in order to pick up those changes - this will ensure that the file database is up to date.
To refresh, head into the list of libraries and right-click the library you want to refresh. Next, choose the menu entry called Refresh.
Note that refreshing a library doesn’t require all files to be re-analyzed - only new arrivals and changed files are processed.
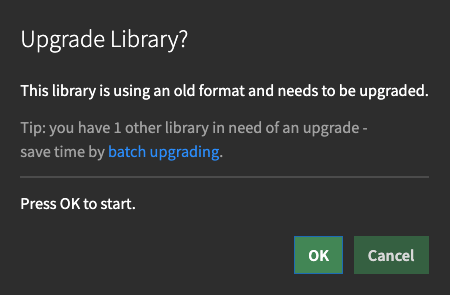
Upgrading a library
If a library was created with an older version of Sononym than the one you’re using, the library might need to be ‘upgraded’.
When multiple libraries are in need of upgrade, you can choose to batch upgrade them:
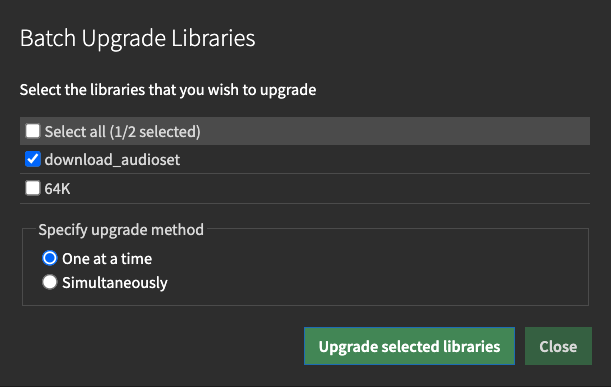
The dialog will allow you to run the upgrade process simultaneously on all libraries, or one library at a time. Upgrading one library at a time might require less computer resources.
Removing libraries
To remove a library, choose “Remove” from it’s context-menu (the library itself is located in the list of libraries). The following prompt will appear:
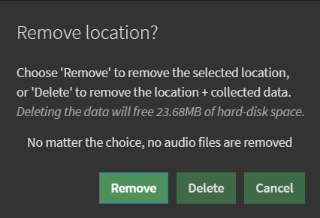
- Remove - choose this option to remove the library from the list of currently active libraries in Sononym, but leave the collected data untouched.
- Delete - choose this to remove the library from Sononym and delete all collected data.
Related pages
- Can I avoid `sononym.db` files scattered throughout my sample folders?
- Why is my library not listed in Sononym?
- Can I 'join' or 'merge' multiple libraries when searching?
- I've got a library somewhere, but I've forgotten where. Can Sononym help me to find it?
- How can I force a complete rescan of my library?
- Can I make my library not appear in Sononym?
- How can I attach a previously scanned library/folder ?
- Which type of folder can become a library?
- Where does Sononym store it's files and databases?
- Does Sononym automatically detect changes to files within libraries?
- Can Sononym show audio properties such as number of channels and bit-rate?